







✦ Troubleshoot with myTVS AI
Fixed in minutes,
with myTVS AI
myTVS AI knows every problem in our guides. It walks you through the fix step by step and sends the fix video. 24×7, in Hindi or English.
Choose your product
Problems & fixes
Music & screens
Android players, older stereos, speakers and amplifiers

Android player24 fixes

Car stereo8 fixes

Speakers & amps1 fix
Cameras
Dashcams, reverse cameras and mirror monitors

Dashcam4 fixes

Reverse camera3 fixes
Tyre & roadside
Tyre inflators, jump starters, electric jacks, vacuum cleaners and washers

Tyre inflator6 fixes

Car jack3 fixes

Vacuum1 fix

Car washer1 fix
Lights & electricals
Headlights, horns, chargers, central locking and mobile holders

Lights2 fixes

Horn1 fix

Charger2 fixes

Central locking1 fix

Mobile holder1 fix
Warranty
Register your product and check your warranty
Warranty2 fixes
Android player
Android player
24 fixes · 21 with video · 6 model versions combined into one card each
View the Android player →Phone connection
5Android Auto not connecting
In short: Pair the phone over Bluetooth, then start Android Auto from the Android Auto app on the player.
-
Turn on Bluetooth on your phone.
-
On the player, swipe down from the top to open the toolbar and long-press the Bluetooth icon to open Bluetooth settings.
-
Wait for the player to find nearby devices, select your phone and tap Pair on the phone's pop-up.
-
Open Apps on the player, start the Android Auto app, tap the connection icon and choose Android Auto.
-
Android Auto connects wirelessly within a few seconds.
Stop and ask our team if it still does not connect after pairing again. Email help@mytvs.com with your model and a short video showing the problem.
View the Android player →In short: Pair the phone with code 0000, give Android Auto all permissions, and keep ZLink 6 updated.
-
On the player open Apps > T-Link.


-
Tap the settings icon and turn OFF both Floating navigation and Background connection.


-
Turn on Wi-Fi and Bluetooth on your phone.

-
On the player open Bluetooth, tap Search and select your phone.


-
Enter the pairing code 0000 on the phone and tap OK.

-
When 'Welcome to Android Auto' appears on the phone, tap Continue.

-
If it does not start: on the phone go to Settings > Apps > All apps > Android Auto > Permissions and allow all.
-
Still not connecting: connect the player to the internet, open the DoFun Play app, tap Skip if asked, find ZLink 6 under the class list and update it. Then repeat the steps.
Stop and ask our team if it fails even with ZLink 6 updated. Email help@mytvs.com with your model and a short video showing the problem.
View the Android player →Apple CarPlay not connecting
In short: Pair the iPhone over Bluetooth, then start CarPlay from the Apple Play app.
-
Turn on Bluetooth on your iPhone.
-
On the player, swipe down to open the toolbar and press and hold the Bluetooth icon to open Bluetooth settings.
-
Select your iPhone from the list, tap Pair on the iPhone, then tap Allow if asked.
-
Open Apps on the player, start the Apple CarPlay app, tap the connection icon and choose Apple CarPlay.
-
CarPlay connects wirelessly within a few seconds.
Stop and ask our team if CarPlay still does not connect after pairing again. Email help@mytvs.com with your model and a short video showing the problem.
View the Android player →In short: Pair the iPhone over Bluetooth with code 0000. If CarPlay still fails, update the ZLink 6 app.
-
On the player open Apps > T-Link.


-
Tap the settings icon and turn OFF both Floating navigation and Background connection.


-
Turn on Wi-Fi and Bluetooth on your iPhone.
-
On the player open Bluetooth, tap Search and select your iPhone.


-
Enter the pairing code 0000 and tap Pair on the iPhone.

-
When the 'Connect to Apple CarPlay' prompt appears, tap Connect.

-
Still not connecting: connect the player to the internet, open the DoFun Play app, tap Skip if asked, find ZLink 6 under the class list and update it. Then repeat the steps.
Stop and ask our team if it fails even with ZLink 6 updated. Email help@mytvs.com with your model and a short video showing the problem.
View the Android player →Background noise on Bluetooth calls
In short: Lower the microphone gain to stop noise on calls.
-
Open the Bluetooth app on the player.

-
Tap the settings icon.

-
Tap Microphone gain.

-
If it is Medium, High or Max, select Low.

Stop and ask our team if the noise continues on Low. Email help@mytvs.com with your model and a short video showing the problem.
View the Android player →Mirror your Android phone screen
In short: Connect over hotspot and Bluetooth, then use the Android Link app.
-
Turn on your Android phone's hotspot. On the player, open the toolbar, long-press Wi-Fi and connect to the hotspot.
-
Turn on Bluetooth on the phone. On the player long-press the Bluetooth icon, tap your phone and enter 0000 on the phone.
-
On the phone, enable Developer options and turn on USB debugging.
-
On the player open Apps > Android Link.


-
Tap the arrow icon at the bottom right, then tap Android Link.


-
Tap the question-mark icon at the top right. A QR code appears. Scan it with the phone.


-
Tap Download (tap 'Download anyway' if warned), install the app and allow all permissions.

-
In the phone app tap Next, Next, then Start.


-
Choose 'Entire screen' and tap Share screen. The phone screen now shows on the player.

Stop and ask our team if the phone screen still does not appear. Email help@mytvs.com with your model and a short video showing the problem.
View the Android player →In short: Connect over hotspot and Bluetooth, then use the Zlink mirror app.
-
Turn on your phone's hotspot and connect the player to it. Turn on Bluetooth on the phone.
-
On the player tap Bluetooth, then Search on the left. Tap your phone and enter 0000 on the phone.
-
On the player open Apps > Z-Link and tap the App icon.


-
Tap Mirror, then the question-mark icon at the top left. A QR code appears.


-
Scan the QR code with the phone, install the app from the Play Store and allow all permissions.


-
Open the phone app and tap + at the top right. Select your player from the list.


-
Tap 'Entire screen', then Start now.

Stop and ask our team if the phone screen still does not appear. Email help@mytvs.com with your model and a short video showing the problem.
View the Android player →Mirror your iPhone screen
In short: Connect over hotspot and Bluetooth, then use AirPlay from the Android Link app.
-
Turn on Personal Hotspot on the iPhone. On the player, open the toolbar, long-press Wi-Fi and connect to the iPhone hotspot.
-
Turn on Bluetooth on the iPhone. On the player long-press the Bluetooth icon, select the iPhone and enter 0000 to pair.
-
On the player open Apps > Android Link.


-
Tap the arrow icon at the bottom right, then AirPlay.


-
On the iPhone open Control Centre and tap Screen Mirroring.

-
Select the myTVS player from the list.

Stop and ask our team if the player does not appear in Screen Mirroring. Email help@mytvs.com with your model and a short video showing the problem.
View the Android player →In short: Connect over hotspot and Bluetooth, then use Screen Mirroring on the iPhone.
-
Turn on Personal Hotspot on the iPhone and connect the player to it. Keep Bluetooth on.
-
On the player tap Bluetooth, then Search on the left. Tap your iPhone, enter 0000 and tap Pair.
-
On the player open Apps > Z-Link and tap the App icon.


-
Tap Mirror.

-
On the iPhone open Control Centre and tap Screen Mirroring.

-
Select the myTVS player from the list.

Stop and ask our team if the player does not appear in Screen Mirroring. Email help@mytvs.com with your model and a short video showing the problem.
View the Android player →Internet & apps
3YouTube not working
In short: Reinstalling YouTube from the app store fixes it.
-
Make sure the player is connected to the internet.
-
Open Apps, press and hold YouTube, drag it to Delete and tap OK.


-
Open the Play Store, search YouTube and install it.


-
Open YouTube. It should work now.
Stop and ask our team if YouTube still fails after reinstalling. Email help@mytvs.com with your model and a short video showing the problem.
View the Android player →Internet or Wi-Fi not working
In short: A weak Wi-Fi signal usually means a loose cable. Wrong time settings also block the internet.
-
Connect the player to your phone's hotspot and look at the Wi-Fi signal at the top of the screen.
-
Very weak signal: ask your installer to check the reverse connecting cable behind the player.
-
Signal fine but no internet: tap the clock on the home screen to open time settings.
-
Turn OFF 'Use network-provided time'. Open Time zone > Region, search India and select it. Go back and turn 'Use network-provided time' ON again.
-
Keep 'Use time provided by network and GPS' always on.
Stop and ask our team if the signal is weak (wiring needs the installer) or the internet still fails after fixing the time. Email help@mytvs.com with your model and a short video showing the problem.
View the Android player →Sign in to your Google account
In short: Sign in once from the Play Store.
-
Connect the player to the internet.
-
Open a Google app, for example Play Store.

-
Tap Sign in, enter your Google email, tap Next, enter your password and tap Next.


-
Tap I agree.

Stop and ask our team if sign-in fails with an error. Email help@mytvs.com with your model and a short video showing the problem.
View the Android player →Camera & DVR
6Rear camera not working
In short: Set the right camera channel and resolution in factory settings.
-
Open Apps > Settings.


-
Scroll down, tap Factory mode, enter 8888 and tap OK.


-
Tap Camera, then RVC channel config, and select MIPICSI0_CH0.


-
Under MIPICSI0_CH0 select the resolution your rear camera supports.


-
Swipe down from the top and tap Restart. After the restart the rear camera should work.


Stop and ask our team if you do not know the camera's resolution, or the camera still shows nothing after restart. Email help@mytvs.com with your model and a short video showing the problem.
View the Android player →Rear camera picture is upside down
In short: Turn off the up-and-down mirror option.
-
Open Settings on the player.

-
Tap Reverse.

-
Turn OFF 'Up & down mirror image' and tap Confirm.


-
The player restarts and the rear camera picture shows the right way up.
Stop and ask our team if the image is still upside down after restart. Email help@mytvs.com with your model and a short video showing the problem.
View the Android player →Blurry front or rear DVR footage
In short: Set recording to AHD 1080 at 25 frames per second.
-
Open Apps > Settings.


-
Tap Factory, enter 123456 and tap Confirm.


-
Tap Reverse camera selection, then Front and rear double recording.


-
Set the mode to AHD 1080P 25 FPS and tap OK.


-
The player restarts. Recordings should now be clear.
Stop and ask our team if it is still blurry after restart. Email help@mytvs.com with your model and a short video showing the problem.
View the Android player →DVR not recording or recordings not showing
In short: DVR recordings are saved on a USB pen drive. Set the storage path once.
-
Make sure a USB pen drive is connected to the player at all times. All DVR recordings are saved on it.
-
Open Apps > DVR.


-
Tap the settings icon, scroll down, tap File storage path and select USB0.


-
Go back and tap the video icon to see and play all front and rear recordings.


Stop and ask our team if recordings still do not appear with the pen drive connected. Email help@mytvs.com with your model and a short video showing the problem.
View the Android player →Set up Drive Buddy+ tracking and view DVR videos on your phone
In short: Track the car, set a geofence and watch DVR videos from the Drive Buddy+ app.
-
Make sure a USB pen drive is connected to the player. DVR recordings are saved on it.
-
On the player open Apps > Drive Buddy+. It shows two QR codes.


-
Scan the first QR code with your phone and install the Drive Buddy+ app. Tap Allow on all permission pop-ups.


-
Enter your email ID, tap Send, enter the OTP, tick the agreement box and tap Login.


-
In the app tap the scanner icon at the top right and scan the second QR code on the player.


-
On the player accept the Track Service agreement and turn Track service ON.


-
Track: route history for the last 15 days.


-
Fence: set the geo-fence area with Monitoring scope and turn on both Enter and Exit fence notifications.


-
DVR: choose Two-Channel, open a video and tap Upload video to see it on the phone.


-
Remote: change volume, play or pause music and skip tracks from the phone.


Stop and ask our team if the app does not link to the player. Email help@mytvs.com with your model and a short video showing the problem.
View the Android player →360° camera calibration
In short: Calibrate the four cameras with the calibration cloth on a flat surface.
Safety first: Calibration is best done by your installer. Ask us if you are unsure.
-
Park on completely flat ground. Keep a measuring tape and the calibration cloth set ready.
-
Open Apps > 360, tap the three-line menu at bottom left, choose Project settings and enter 4321.
-
Open Panorama calibration and select the first calibration template.
-
Place each calibration cloth at the centre of that side of the car, flat on the ground, 20 to 30 cm from the car.
-
Adjust the camera lenses so both black squares are visible in front, rear, left and right views.
-
Measure the AB and AC distances, tap the measurement icon, enter them and tap Next step.
-
Line up the green markers with the corners of the black squares, then tap Confirm eight times. Repeat for the other three cameras.
-
When all four are confirmed, tap Splicing.
Stop and ask our team if you do not have the calibration cloth set, or the view is still misaligned. This is best done by the installer. Email help@mytvs.com with your model and a short video showing the problem.
View the Android player →Sound & radio
2Where are the FM radio settings on the Android player?
In short: Radio region or antenna power settings may not suit your use.
-
Open Settings, scroll down the left side and tap Factory. Enter 123456 and confirm.
-
Scroll down to Radio settings. Here you can see and change region, radio antenna power and other radio settings.
Stop and ask our team if you are not sure which region or antenna setting to choose, or there is still no reception. Email help@mytvs.com with your model and a short video showing the problem.
View the Android player →No sound from my Android player.
In short: Speaker wiring, or the player needs an MCU update.
-
Ask the installer to check the speaker wire connections.
Stop and ask our team if the wiring is fine. An MCU update is done by the service team. Email help@mytvs.com with your model and a short video showing the problem.
View the Android player →Screen, buttons & steering controls
5Side keys not showing on screen
In short: Bring the side keys back and keep them visible.
-
Swipe down from the top of the screen to open Quick settings.

-
Tap Suspension. The side keys appear again.


-
To keep them always visible: Settings > General > Floating style > 'Vertical floating buttons always'.
Stop and ask our team if the keys still do not appear. Email help@mytvs.com with your model and a short video showing the problem.
View the Android player →Side panel buttons not working (set up the keys)
In short: Re-learn the physical side buttons one by one.
-
Open Apps > Settings.


-
Tap Factory mode, enter 8888 and tap OK.


-
Select Touch key learning.

-
Tap Reset to clear old key mappings, then tap Start.


-
Tap Home on the screen, then press the Home key on the panel.

-
Tap Back on the screen, then press the Back key.

-
Do the same for Vol+ and Vol- and any other keys shown.


-
Exit and test every key.

Stop and ask our team if the buttons still do not respond after mapping. Email help@mytvs.com with your model and a short video showing the problem.
View the Android player →In short: Re-learn the physical side buttons one by one.
-
Open Apps > Settings.


-
Tap Factory, enter 123456 and tap Confirm.


-
Select Touch area key.

-
Tap Start, then Clear to delete old key mappings.


-
Tap Position and select Left. Then tap Start.


-
Tap Home on the screen, then press the Home key on the panel.

-
Tap Back on the screen, then press the Back key.

-
Do the same for Vol+ and Vol- and any other keys shown.


-
Tap End. The mappings save automatically. Test every key.

Stop and ask our team if the buttons still do not respond after mapping. Email help@mytvs.com with your model and a short video showing the problem.
View the Android player →My player screen does not turn on.
In short: Power connector, wiring, or the display.
-
Put the car in reverse. If the reverse camera picture appears, the unit has power and the display or touch is the issue.
-
If your player has a remote, press its On/Off button.
-
Check the remote: point it at your phone camera and press a key. A blinking light on the phone screen means the remote works.
Stop and ask our team if it still does not power on. The installer must check the power coupler and wires; do not open the dashboard yourself. Email help@mytvs.com with your model and a short video showing the problem.
View the Android player →Make the on-screen keyboard bigger
In short: Change keyboard height to Extra tall.
-
Open any app that shows the keyboard, for example Chrome.

-
Tap the settings (gear) icon on the keyboard.

-
Tap Preferences, then Keyboard height.


-
Select Extra tall.

Stop and ask our team if the setting is missing. Email help@mytvs.com with your model and a short video showing the problem.
View the Android player →Steering controls or car info not working (CAN box setup)
In short: Select your CAN box brand, car make and model, then upgrade.
-
Connect the player to the internet.
-
Open Apps > Settings.


-
Scroll down, tap Factory, enter 8888 and tap OK.


-
Tap Vehicle, then Automotive type.


-
Under Manufacturer select the CAN box brand fitted in your car (for example Raise).

-
Under Category select your car brand, and under Model your car model.


-
Tap Upgrade, then Detect, then Upgrade. The player restarts and saves the settings.


Stop and ask our team if you do not know the CAN bus brand fitted in your car, or the controls still do not work. Email help@mytvs.com with your model and a short video showing the problem.
View the Android player →In short: Select your CAN box brand, car make and model, then apply.
-
Connect the player to the internet.
-
Open Apps > Settings.


-
Scroll down, tap Factory, enter 123456 and tap Confirm.


-
Tap Select model.

-
Select the CAN box brand fitted in your car (for example Raise).

-
Select your car brand, then your car model.


-
Tap Public, then OK.


-
Tap OK on both confirmation pop-ups. The player restarts and saves the settings.


Stop and ask our team if you do not know the CAN bus brand fitted in your car, or the controls still do not work. Email help@mytvs.com with your model and a short video showing the problem.
View the Android player →Speed, password & warranty
3My Android player asks for a password after a restart. What do I do?
In short: The player's lock screen, or a screen lock that Google copied from the customer's phone when the same Google account was added.
-
Enter 8888.
-
If that does not open it, try the screen-lock PIN or pattern of your phone. Google may have copied it to the player from the same Google account.
-
Still locked? On your phone, remove the screen lock for that Google account, then try the player again.
Stop and ask our team if none of these opens it. Call 8010241024 or visit your nearest myTVS service centre. Email help@mytvs.com with your model and a short video showing the problem.
View the Android player →Player is slow, lagging or hanging
In short: A system update fixes most lag and hanging problems.
-
Connect the player to the internet.
-
Open Apps > Settings.


-
Scroll down, tap About, then scroll down and tap Detection update.


-
Tap Detection update again to check for the latest software.

-
Tap Download.

-
When the download finishes, tap Update now. The player installs the update and restarts on its own.

Stop and ask our team if it still lags after the update. Email help@mytvs.com with your model and a short video showing the problem.
View the Android player →Activate your Android player warranty
In short: Connect to Wi-Fi and enter the serial number on the activation screen.
-
On the warranty pop-up tap Open network, then Network & internet.


-
Turn Wi-Fi on and connect to a working internet connection.

-
Go back and enter the serial number from the warranty card or the back of the player.

-
Tap Activate. You will see 'Activated successfully'.

Stop and ask our team if activation fails. Email help@mytvs.com with your model and a short video showing the problem.
View the Android player →Dashcam
Recording
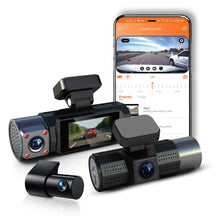
1Dashcam not recording
In short: Most recording problems come from the memory card. Use the right card and format it once on a computer.
-
Use a Class 10 microSD card.
-
Before first use, do not put the card straight into the dashcam. Put it in a laptop or computer with a card reader.
-
Format it: File system FAT32, Allocation unit size 32 KB (kilobytes).

-
Eject the card safely and put it back in the dashcam. Power on. Recording starts on its own.
Stop and ask our team if it still does not record with a freshly formatted card. Email help@mytvs.com with your model and a short video showing the problem.
View the Dashcam →App & phone
2Connect the dashcam to your phone and view recordings
In short: Install the myTVS Dashcam app, join the dashcam's Wi-Fi, and you can see, download and share every recording.
-
Make sure your phone has internet. Scan the QR code in the user manual and install the myTVS DCam Plus app.
-
Keep the phone disconnected from any Android player's Android Auto or CarPlay while you do this.
-
Open the app and tap Register. Enter your email, create a password and tap Retrieve. Enter the OTP from your email and tap Register.


-
Sign in with your email and password, tick the terms box and tap Sign in.

-
Tap the three-line menu at the top left > Add device and select your dashcam model.


-
Tap Allow access, then Yes. Turn on location and tap Start scan.


-
Select your dashcam, enter the dashcam password and tap Continue.


-
Tap Go to settings and connect the phone to the dashcam's Wi-Fi. Return to the app and tap Continue.


-
Tap Go to settings again, reconnect to your normal Wi-Fi or mobile data, return and tap Continue.


-
Tap the dashcam on the home screen for live view, recordings, photos and collision (event) files. Select a video and tap Download or Share.

Stop and ask our team if the dashcam Wi-Fi does not appear, or the app cannot connect. Email help@mytvs.com with your model and a short video showing the problem.
View the Dashcam →Wiring & installation
1Dashcam wiring and hardwire installation
In short: How the hardwire cable connects to your car's fuse box. Layout varies by car model.
Safety first: Fuse-box work should be done by a trained installer with the ignition off. If you see smoke, smell burning or a fuse keeps blowing, stop and contact us.
-
Plug the Type-C power cable into the dashcam.
-
Route the harness through the car's trim down to the fuse box. The layout depends on your car.
-
ACC wire to an accessory (ACC) fuse.
-
Battery B+ wire to a constant battery fuse.
-
Earth wire tightened to an unpainted metal bolt or the chassis.
Stop and ask our team if you are not comfortable working at the fuse box. Use a trained installer; we also offer doorstep fitting. Email help@mytvs.com with your model and a short video showing the problem.
View the Dashcam →Car washer
Fixes
1Assemble and start your car washer
In short: Fit the parts in order, connect the water supply, then switch on.
-
Fit the handle, the gun holder, the pressure-hose holder, the cable holder and both wheels.
-
Fit the water inlet filter, then the one-click water inlet connector on it.
-
Connect one end of the high-pressure hose to the machine's water outlet.
-
Fit the spray wand on the spray gun (or the soap bottle for foam). Connect the other hose end to the gun.
-
Connect your garden hose to the one-click inlet connector, then switch the power on.
Stop and ask our team if a part is missing or the washer does not start. Email help@mytvs.com with your model and a short video showing the problem.
View the Car washer →Tyre inflator
Does not switch on
2My tyre inflator does not switch on. No motor sound and no air.
In short: No power from the car's 12V socket: ignition off, plug not fully in, a blown fuse, or a damaged plug or wire.
-
Start the car engine.

-
Push the inflator plug fully into the car's 12V socket.
-
Check the fuse: unscrew the tip of the 12V plug. If the fuse has a black mark or a broken metal strip, replace it with the spare fuse in the box and screw the tip back tightly.

-
Switch on the inflator.

-
Still nothing: try it in another car. If it works there, your car's socket or its fuse is faulty.

Stop and ask our team if it still does not turn on. Contact the team or visit your nearest myTVS service centre (https://mytvs.com/pages/store-locator). Email help@mytvs.com with your model and a short video showing the problem.
View the Tyre inflator →How do I check or replace the fuse in my tyre inflator plug?
In short: A blown fuse in the 12V plug stops the inflator.
-
Unscrew the tip of the 12V power plug to open the fuse compartment.
-
Look at the fuse. A black mark or a broken metal strip inside means it is blown. Replace it with the spare fuse provided.
-
Screw the plug tip back tightly.
-
Plug in the inflator and check that it works.
Stop and ask our team if it still does not work with the new fuse. Contact the team or visit your nearest myTVS service centre (https://mytvs.com/pages/store-locator). Email help@mytvs.com with your model and a short video showing the problem.
View the Tyre inflator →Pressure & meter
2My tyre inflator runs but the pressure is low or air leaks at the valve.
In short: A loose or damaged nozzle, or a faulty tyre valve. Rarely the inflator itself.
-
Fix the inflator nozzle tightly on the tyre valve so no air leaks.
-
Check the nozzle for damage, and the air hose for bends, cuts or leaks.
-
Run the inflator again and watch whether the pressure rises.
-
Try another tyre of the car. If that tyre fills, the first tyre's valve is faulty.
-
If the gauge does not move at all, the inflator is not making pressure.
Stop and ask our team if the pressure still does not rise. Contact the team or visit your nearest myTVS service centre (https://mytvs.com/pages/store-locator). Email help@mytvs.com with your model and a short video showing the problem.
View the Tyre inflator →The digital meter reading on my inflator is not increasing.
In short: The unit or target pressure is not set.
-
Press and hold the Mode button to select PSI.
-
Use + or – to set the tyre pressure you want.
-
Press the Power button to start.
-
The inflator stops on its own when it reaches the set pressure.
Stop and ask our team if the reading does not change while inflating, or it does not stop at the set pressure. Email help@mytvs.com with your model and a short video showing the problem.
View the Tyre inflator →Using it right
2How do I use a myTVS tyre inflator properly?
In short: First use.
-
Check your tyre's recommended pressure on the sticker inside the driver's door.
-
Start the car engine.
-
Plug the inflator into the car's 12V socket.
-
Connect the nozzle tightly to the tyre valve. A loose fit leaks air and gives wrong readings.
-
Switch on and inflate to the recommended pressure. Inflate one tyre at a time.
-
Switch off and remove the nozzle from the valve.
Stop and ask our team if it does not inflate. Email help@mytvs.com with your model and a short video showing the problem.
View the Tyre inflator →My tyre inflator gets hot while I use it.
In short: Running it too long without a break.
-
Inflate one tyre at a time.
-
After each tyre, let the inflator cool down before the next one.
-
Do not run it continuously for long.
Stop and ask our team if it gets very hot, smells of burning or smokes. Stop using it and contact the team. Email help@mytvs.com with your model and a short video showing the problem.
View the Tyre inflator →Warranty registration, status check and activation
2 fixes · 2 with video
Fixes
2How do I register the e-warranty?
In short: Registration is online, from the QR code on the warranty card.
-
Scan the QR code on the warranty card. The myTVS warranty page opens. Tap Register now.


-
Enter your mobile number, tap Send OTP, enter the code you get and tap Verify OTP.


-
Upload a photo of your warranty card.

-
Check the serial number and select your state and city.


-
Accept the terms and tap Submit registration. You get a confirmation message after the myTVS team verifies it.


Stop and ask our team if the OTP or upload fails. Email help@mytvs.com with your model and a short video showing the problem.
How do I check my warranty status or validity?
In short: Status is shown on the myTVS warranty website by serial number.
-
Scan the QR code on the warranty card. The myTVS warranty page opens.


-
Under Check warranty validity tap Check status.


-
Enter the serial number and tap Check.

-
You see the warranty status, registration date and validity date.

Stop and ask our team if the serial number is not found. Email help@mytvs.com with your model and a short video showing the problem.
Car jack
Fixes
3The jack does not reach my car's lifting point. Can I change its height?
In short: The jack's starting height can be adjusted.
-
Rotate the top of the jack shaft anticlockwise to raise its starting height. The range is 110 mm to 400 mm.
Stop and ask our team if it still does not reach the lifting point. Email help@mytvs.com with your model and a short video showing the problem.
View the Electric car jacks and impact wrench →My electric jack will not go down.
In short: No power from the car socket, a blown fuse or a broken wire.
-
Check that the car's cigarette lighter socket has power, and check the jack's plug fuse and wire.
-
If it still does not move, loosen the release screw on top of the jack with the L-key from the accessories box.
Stop and ask our team if the car is on the jack and it will not come down. Call the team first. Email help@mytvs.com with your model and a short video showing the problem.
View the Electric car jacks and impact wrench →My electric jack or impact wrench has no power.
In short: No power from the car socket, a blown fuse or a broken wire.
-
Check the car's cigarette lighter socket and its fuse.
-
Plug another device or charger into the same socket to test it.
-
Check the fuse in the jack's plug and look for breaks in the wire.
-
Wrench: hold the knob and start it. If it spins freely, it needs repair.
Stop and ask our team if the socket works but the jack or wrench does not. Email help@mytvs.com with your model and a short video showing the problem.
View the Electric car jacks and impact wrench →Vacuum
Fixes
1My car vacuum cleaner runs but has no suction.
In short: The filter or the nozzle (vacuum mouth) is not fitted properly.
-
Check that the filter is fitted in the right position.
-
Fit the vacuum nozzle (mouth) properly.
-
Remove the nozzle and hold a piece of paper at the opening to check suction.
Stop and ask our team if there is no suction even without the nozzle. Email help@mytvs.com with your model and a short video showing the problem.
View the Car vacuum cleaners →Car stereo
Bluetooth & calls
4My phone won't connect to the stereo by Bluetooth.
In short: An old pairing on the phone or the stereo.
-
On the phone, forget (unpair) the myTVS device.
-
Reset the stereo and try pairing again.
Stop and ask our team if it still will not pair. Email help@mytvs.com with your model and a short video showing the problem.
View the Older car stereos and MP5 players →The other person can't hear me on calls through the stereo.
In short: Phone-specific behaviour or the built-in mic.
-
Connect a different phone and make a test call.
-
For better sound, an external mic can be added.
Stop and ask our team if no phone works. Email help@mytvs.com with your model and a short video showing the problem.
View the Older car stereos and MP5 players →The connection pop-up doesn't show on my iPhone.
In short: iPhone settings.
-
Reset the iPhone's settings.
-
Restart the iPhone and connect again.
Stop and ask our team if the pop-up still does not show. Email help@mytvs.com with your model and a short video showing the problem.
View the Older car stereos and MP5 players →How do I get my phone contacts on the stereo?
In short: Contact sharing was not allowed when pairing.
-
When the phone connects by Bluetooth, tap Allow on the 'Share contacts' pop-up.
-
Open the stereo's phone book and add the contacts.
Stop and ask our team if contacts still do not appear. Email help@mytvs.com with your model and a short video showing the problem.
View the Older car stereos and MP5 players →Radio & volume
2FM radio has poor or no reception on my stereo.
In short: The antenna wire is loose or joined, the antenna earth is poor, or the antenna is weak.
-
Check that the antenna wire is firmly connected and has no joint.
-
Reset the stereo and auto-tune FM.
-
Try at another location, away from tall buildings.
Stop and ask our team if reception is still poor. The installer should check the antenna earthing or fit a new antenna. Email help@mytvs.com with your model and a short video showing the problem.
View the Older car stereos and MP5 players →The volume goes up or down by itself.
In short: Steering-control key learning or system settings.
-
Go to Settings > Steering interface, tap Start, then Clear.
-
If it continues, reset the system with a pin in the reset hole.
Stop and ask our team if the volume still changes on its own. Email help@mytvs.com with your model and a short video showing the problem.
View the Older car stereos and MP5 players →Screen & maps
2My older Android/MP5 player is stuck and the touch does not work.
In short: A software freeze.
-
Press the reset hole with a pin or pen tip to restart the system.
Stop and ask our team if it stays stuck after a reset. Email help@mytvs.com with your model and a short video showing the problem.
View the Older car stereos and MP5 players →How do I use maps offline on my older player?
In short: Offline maps must be downloaded first.
-
Open Maps and tap the menu at the top left.
-
Tap Offline maps and download your area.
-
After the download finishes, maps work without internet.
Stop and ask our team if the download fails. Email help@mytvs.com with your model and a short video showing the problem.
View the Older car stereos and MP5 players →Reverse camera
Reverse cameras, mirror monitors and parking sensors
3 fixes
View the Reverse cameras, mirror monitors and parking sensors →Fixes
3The picture on my mirror monitor is upside down or mirrored.
In short: Flip mode setting.
-
Using the remote, open Settings and change Flip mode.
Stop and ask our team if the picture is still wrong. Email help@mytvs.com with your model and a short video showing the problem.
View the Reverse cameras, mirror monitors and parking sensors →The reverse camera picture is blurry or not showing.
In short: A dirty lens or a loose connection.
-
Clean the camera lens.
-
Ask the installer to check the wiring between the camera and the screen.
Stop and ask our team if the picture is still blurry or missing after cleaning. Email help@mytvs.com with your model and a short video showing the problem.
View the Reverse cameras, mirror monitors and parking sensors →No sound through the car speakers from my mirror monitor (Bluetooth, USB or SD).
In short: The monitor sends sound to the car stereo by FM. Both must be on the same frequency.
-
Turn on FM output on the monitor screen.
-
Set the car stereo to the same FM frequency as the monitor (for example 87.7).
-
Check that Bluetooth is connected to the monitor and Bluetooth mode is on.
-
Screen stays on while using Bluetooth: tap the top-right of the screen for sleep mode (TRV-67T).
Stop and ask our team if there is still no sound. Email help@mytvs.com with your model and a short video showing the problem.
View the Reverse cameras, mirror monitors and parking sensors →Horn
Fixes
1My horn sounds low, odd or not at all.
In short: Wiring, a loose connection, tuning, or water damage.
-
Check the horn wiring and that the connector is not loose or damaged.
-
Test the low and high horns separately.
-
Look inside the horn mouth: a white sticker that has turned red means water damage, which is not covered by warranty.
-
A technician can test it on direct 12V and re-tune it.
Stop and ask our team if the wiring is fine and it still sounds wrong. Email help@mytvs.com with your model and a short video showing the problem.
View the Horns →Lights
Fixes
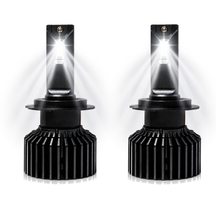
2My LED headlight bulb does not light up.
In short: A loose connection, or one faulty bulb.
-
Check the bulb connections.
-
Swap the left and right bulbs. If the fault moves with the bulb, the bulb is faulty.
-
A technician can test it with a direct battery connection.
Stop and ask our team if the bulb is faulty or the connection is fine. Email help@mytvs.com with your model and a short video showing the problem.
View the LED headlights, HID and fog lights →My HID light flickers, goes off after a while, or won't start.
In short: The ballast, the bulb, or the relay wire (H4).
-
Swap the bulbs left to right, then the ballasts, to find the faulty part.
-
On H4 kits check the relay wire.
Stop and ask our team if the fault stays. Burnt bulbs and relay wires are not covered by warranty. Email help@mytvs.com with your model and a short video showing the problem.
View the LED headlights, HID and fog lights →Charger
Fixes
2My car laptop charger is not charging the laptop.
In short: No power from the car socket, or a laptop or adapter issue.
-
Check that the car's cigarette lighter socket has power.
-
Try the charger in another car.
-
Try another laptop, and check the USB port with another USB device.
Stop and ask our team if it fails in another car with another laptop. Email help@mytvs.com with your model and a short video showing the problem.
View the Car laptop charger and cables →My charging cable is not working.
In short: The cable, the adapter or the device.
-
Try the cable with another device and another adapter.
Stop and ask our team if it fails with all devices. Email help@mytvs.com with your model and a short video showing the problem.
View the Car laptop charger and cables →Speakers & amps
Fixes
1My amplifier, bass tube or speaker has no sound or no power.
In short: Wiring, the fuse, a damaged connector or the music player's output.
-
Check that the connector light comes on.
-
Check the wiring, the connector and the bass tube or amplifier fuse. There must be no break in the wire.
-
Try the speaker or woofer with another wire or another amplifier.
Stop and ask our team if the fuse and wiring are fine. The installer should test the player output with a multimeter. Email help@mytvs.com with your model and a short video showing the problem.
View the Speakers, amplifiers and bass tubes →Central locking
Fixes
1My central locking remote is not working.
In short: A weak battery or a faulty remote.
-
Replace the remote battery.
-
Point the remote at your phone camera and press a button. If no light blinks on the screen, the remote is faulty.
Stop and ask our team if the remote blinks but the car does not respond. Email help@mytvs.com with your model and a short video showing the problem.
View the Central locking →Mobile holder
Fixes
1My mobile holder grip is loose.
In short: The arms are not closed properly.
-
Press the holding arms together to close the gap, then open them again with the button.

Stop and ask our team if it still does not hold the phone. Email help@mytvs.com with your model and a short video showing the problem.
View the Mobile holders →Didn’t find it?
Ask myTVS AI in your own words, Hindi or English. Or take it to a myTVS service center near you.
Still stuck?
Our AI assistant answers instantly, and our service team is a message away.
Phone support: Mon–Sat, 10 AM–6:30 PM. Need a service centre? Find one near you.